Make connecting with your audience simple with our easy to use WordPress Plugin.
Engage your audience effortlessly using our user-friendly WordPress Plugin, designed to make the process simple and straightforward. By utilizing the custom Trggr short code, you can easily control the visibility of content powered by rules you define and even geofencing. In addition, integrating your WPForms and Contact Form 7 forms with popular email marketing platforms like Klaviyo, Constant Contact, and Active Campaign has never been quicker or easier. Streamlining newsletter and CRM integration.
Our plugin makes it easy with quick links to your account, our documentation, and integration to forms.

Installing the Plugin
Installing the Trggr WordPress plugin is a snap. Simply download the “Trggr_WP_Plugin” project from our GitHub repository.
Next navigate to your plugins within the WordPress admin area and click the “Add New”. Then click on “Upload Plugin” at the top of the screen.

From here you’ll be able to browse and select the Trggr_WP_Plugin.zip file you downloaded earlier. Then click “Install Now” and later “Activate”.

Installation is now complete and the Trggr JavaScript file is enqueued on your website allowing you to start engaging your users!
Creating the WP Forms Integration
In order to have WP Forms send requests to your desired CRM, you’ll first need to create a create an integration following one of our integration guides. Then, create a simple form trigger.
Configuring the Plugin for WP Forms Integration
Now that you’ve created the Trigger in your account you can now integrate Trggr with WP Forms quickly & easily to send data to a range of integrations like MailChimp, HubSpot, Constant Contact, Active Campaign, and Klaviyo.
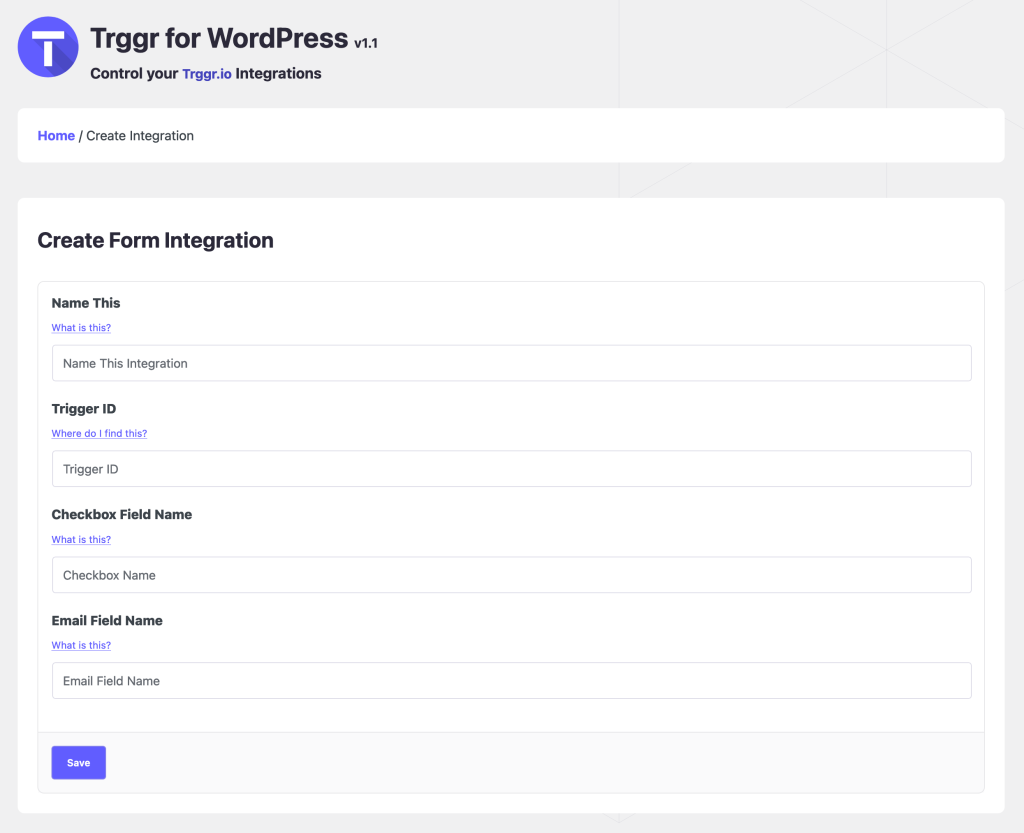
Click the “Add Integration” button seen in the “Form Integrations” section.

Enter the following information to integrate your form with a Trggr you’ve created in your account.

Name
Give this form integration a name. It can be anything you like to easily identify this integration later. For example, “Contact Form” or “Newsletter”.
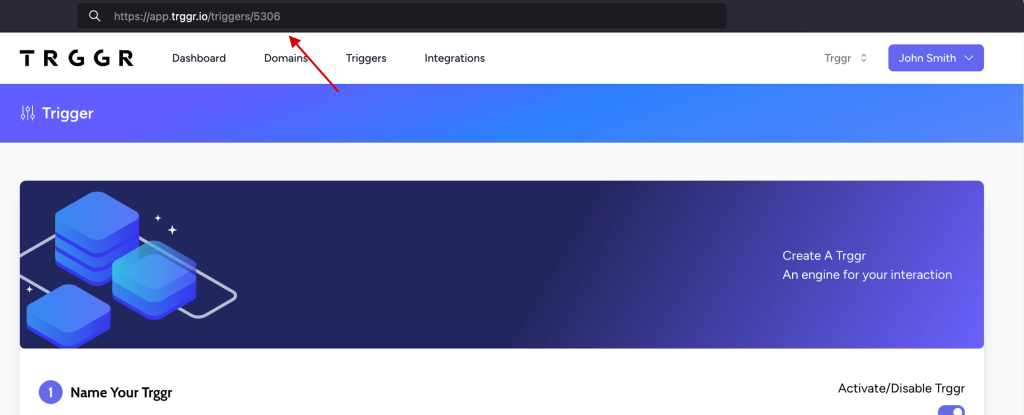
Trigger ID
The Trigger ID can be found in the URL bar when viewing the Trigger you created. For example, in the below example the Trigger ID would be 5306. Copy this and paste it into the “Trigger ID” field.

Checkbox Field Name ( Optional )
For GDPR compliance or “opt-in” permission you can reference a checkbox to confirm the user would like to be added to your newsletter. This field should be the name of the checkbox in your form. For example, in the below WP Forms integration the checkbox name is “Sign me up for the newsletter!”.

Email Field Name
This field should be the name of the email input field in your form. For example, in the below WP Forms integration the input name is “Email”.

Finally, click “Save” to finalize your integration.
Using the Trggr Shortcode
With Geofencing / Geolocation
Use a WordPress shortcode when creating a post or page to easily integrate with a Trigger. This powerful addition allows you to seamlessly hide / show content for specific users on your website. For example, below is a shortcode that will connect to the Trggr API and enable a special offer if the user meets the defined criteria.
[trggr-content id=5144]
<div>
    A special offer just for you! Simply add the coupon code 10OFFNOW.
</div>
[/trggr-content]
Read more about Trggr’s WordPress Geolocation Plugin abilities.